Reviewed: Kent Wang MTM Program – Sport Coat
Disclaimer: This Kent Wang MTM sport coat was made for me at no cost, in exchange for an honest review of the process and final product.
Beginning with a handmade white linen pocket square that seemed to be too difficult to find at a reasonable price thirteen years ago, Kent Wang has grown into a well respected online haberdashery. They offer everything from a broad range of accessories – including some iconic pocket squares – to full-canvas suits and sport coats. You will have seen me wearing lots of Kent Wang over the years, including pocket squares, ties, handgrade shoes and their most recent hit, the shawl collar cardigan.
Chatting with the team at Kent Wang earlier this year, an opportunity arose to collaborate on this sport coat. I’ve seen some lovely examples featured in their StyleForum thread, but most frequently on Pani’s @caustic_man Instagram account, so I was excited to work with them on this piece.
Kent Wang MTM Process
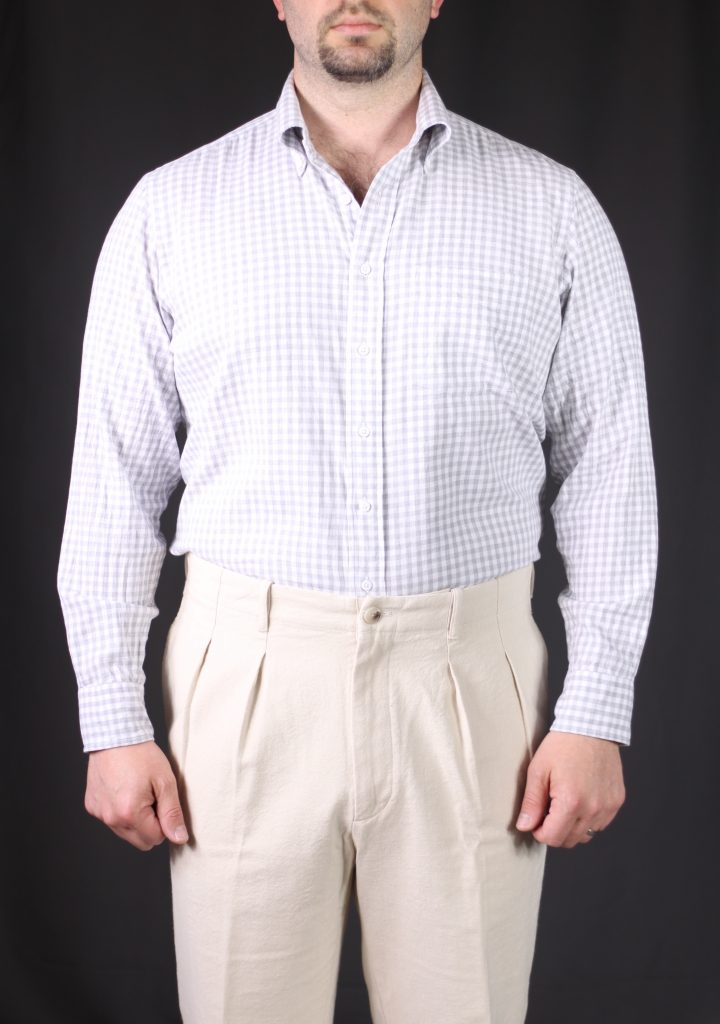
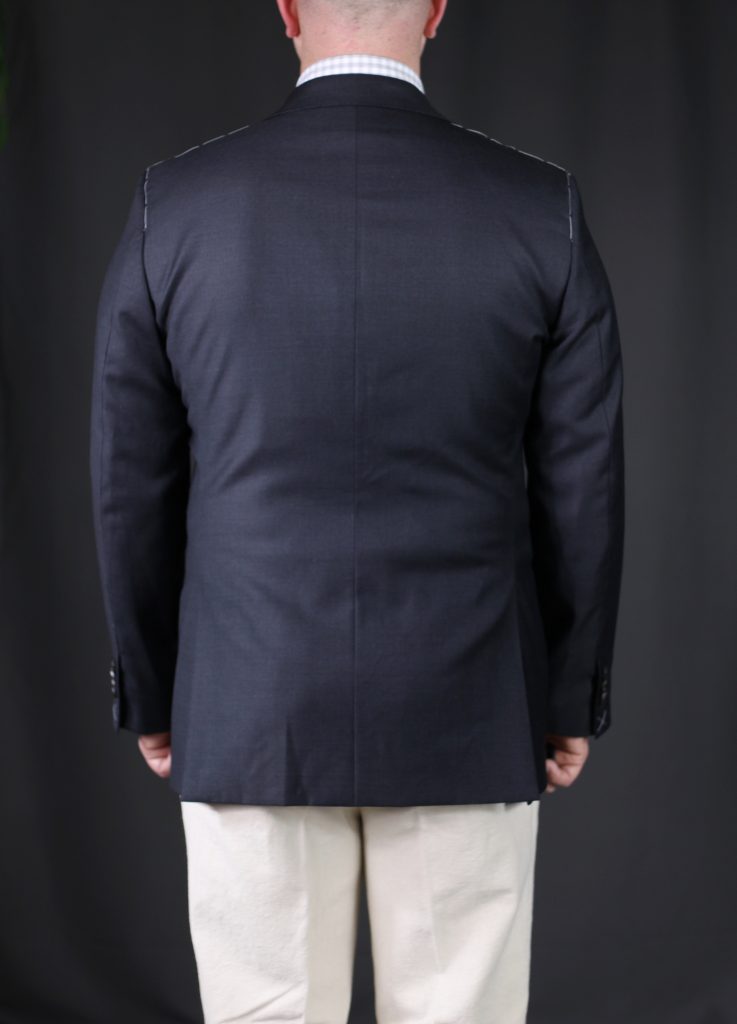
Unlike many online MTM offerings, the Kent Wang MTM program all begins with a trial garment. They do have an informative page regarding fit and construction to review prior to ordering the trial garment. This is the first time for me to go through a fitting analysis like this. The jacket arrived, and I took some pictures to send to Aaron to kick-off the discussions. We needed front, back and side shots, as well as a front shot without the jacket to provide some shoulder slope context (without the jacket in the way).
Here were Aaron’s recommendations based on the photos I sent:
- Shoulder width +0.5 cm
- Shoulder angle forward +0.5 cm each side
- Right shoulder lower -1 cm
- Forward posture note
- Buttoning point looks good. Please double check. The buttoning point should be at the narrowest part of your waist. Look at the side of the jacket and see where it curves in the most.
- Sleeve length -1 cm right side, -1.5 cm left side. Please double check. With your arms laying naturally at your side, your shirt sleeve should end at the third joint (base joint) of your thumb. The jacket sleeve should end 1.5 cm above that.
- Bicep -1 cm. This will narrow the sleeve slightly.
- Cuff width -1 cm, if you feel it is too wide.
- Sleeve pitch backward 0.5 cm
- Lower collar -0.5 cm cm. This will take care of the excess fabric on the back, right below the collar.
- Back (armpit to armpit) 0 cm
- Waist +0.5 cm. It’s pulling across the back and causing the vents to pop out.
- Hips/seat +1 cm
- Jacket length 0 cm. Please double check. It should cover your butt completely.
I had some small notes of my own, but essentially agreed with Aaron’s assessment. Unlike many of the comments you often hear from online/armchair tailors, Aaron has a great eye for fit, which I can only imagine is challenging based off a handful of images. It will be a three dimensional garment after all.
The Sport Coat’s Configuration
Since I’d planned for this to be a sport coat with a bolder fabric, I wanted to ensure that the construction of the jacket aligned with that approach.
MTM Options
| Option | Selection |
|---|---|
| Front Style | 3-roll-2 button, notch lapel |
| Gorge height | High |
| Structure | Soft full canvas |
| Lining Coverage | Half (+$20) |
| Lining Color | Dark Tan |
| Piping Color | Dark Grey |
| Lapel Width | Notch 10cm/4″ |
| Milanese Buttonhole (+$15) | Yes |
| Lapel Facing (+$25) | None |
| Shoulder | No padding, with con rollino |
| Side Pockets | Patch, round |
| Ticket Pocket | None |
| Flap Size | None |
| Chest Pocket | Patch round |
| Vents | Double (side) |
| Sleeve Buttons | 3 |
| Sleeve Buttons Overlap | No (kissing) |
| Cuff Finishing | Working buttonholes |
| Throat Tab | No |
| Pick Stitching | Extensive 6mm |
| Buttons | Corozo medium brown |
| Elbow Patches | None |
| Monogram (+$10) | None |
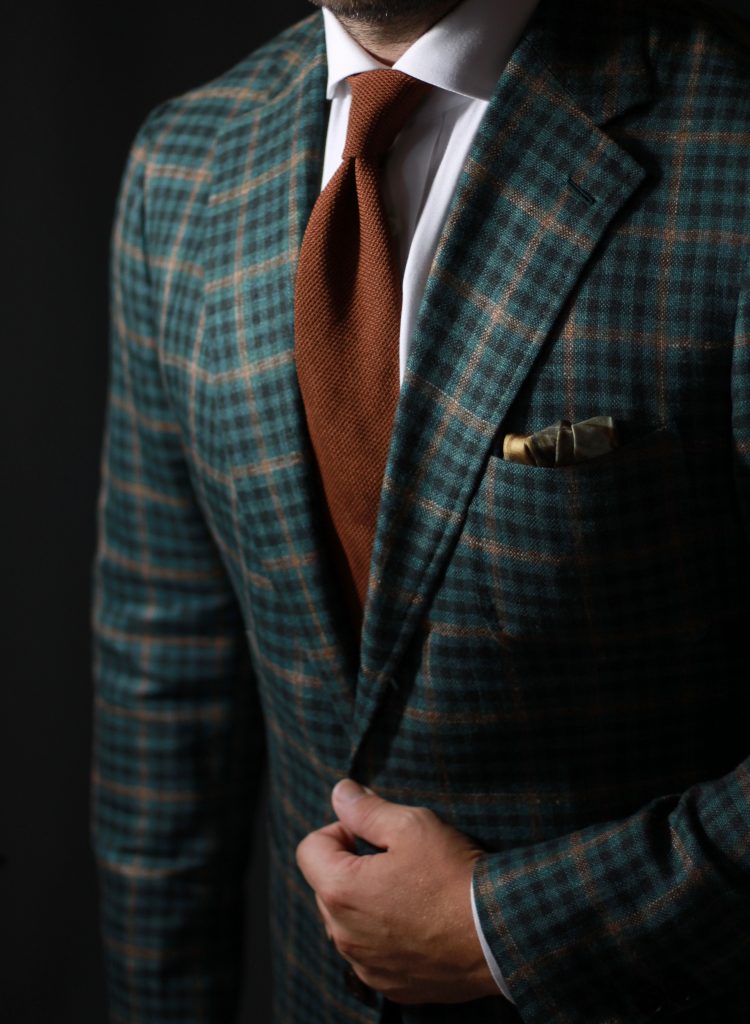
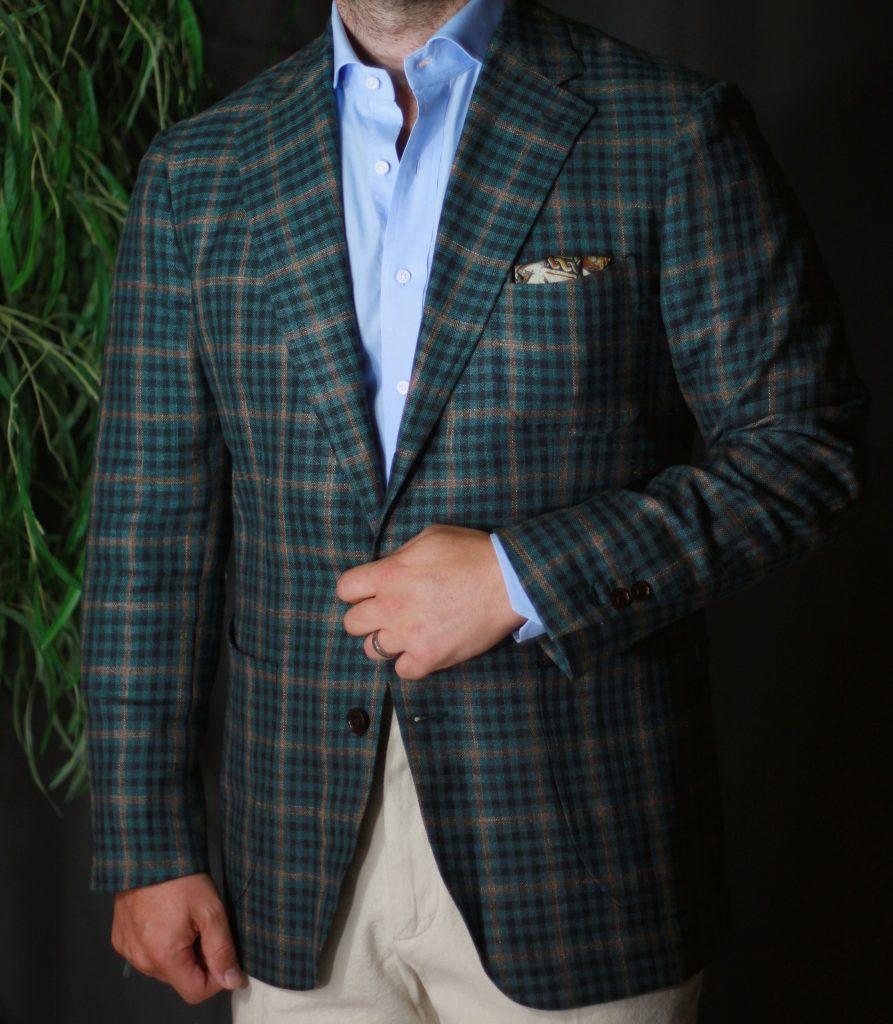
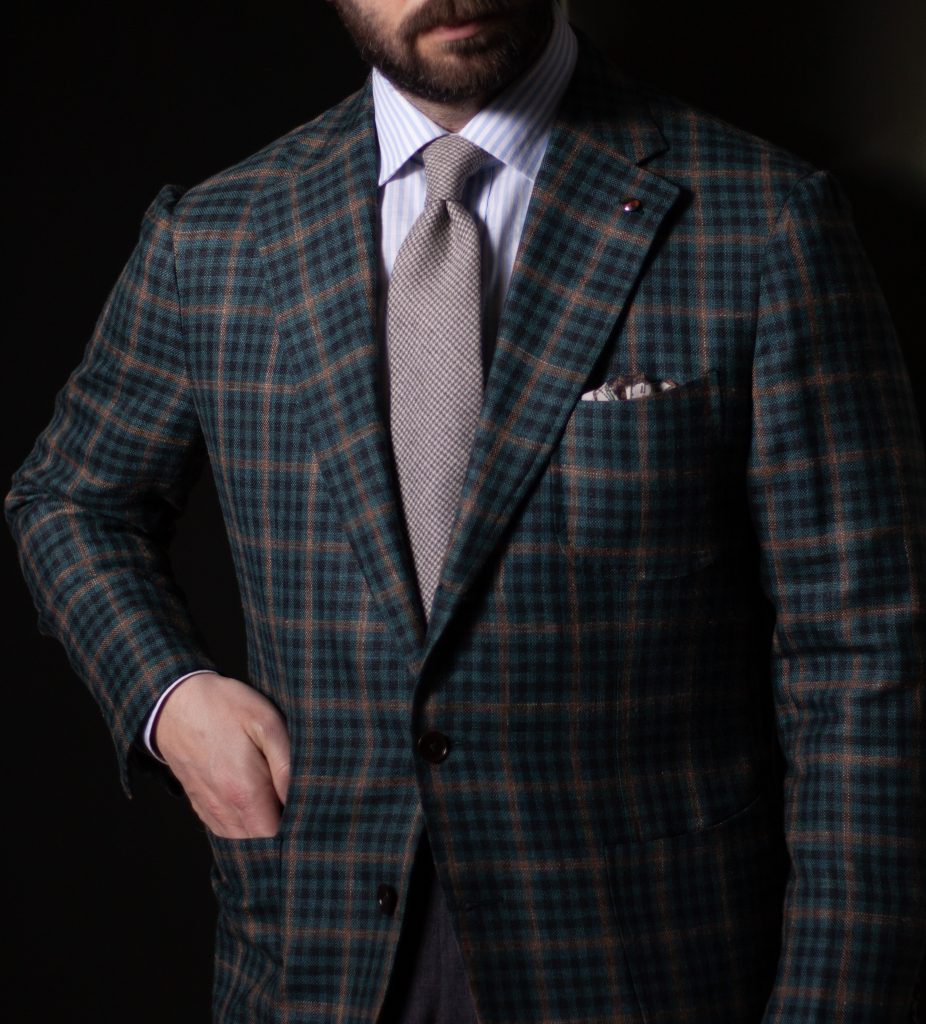
The key details of the jacket are as follows: 3R2 with wide lapels, soft full canvas construction, con rollino shoulders, and triple patch pockets. Since the fabric I chose is a wool/silk/linen blend in a fairly light weight, I opted for the quarter lining in a dark tan bemberg. Here’s a link to the options form you’d need to fill out to get started.
Choosing a Fabric
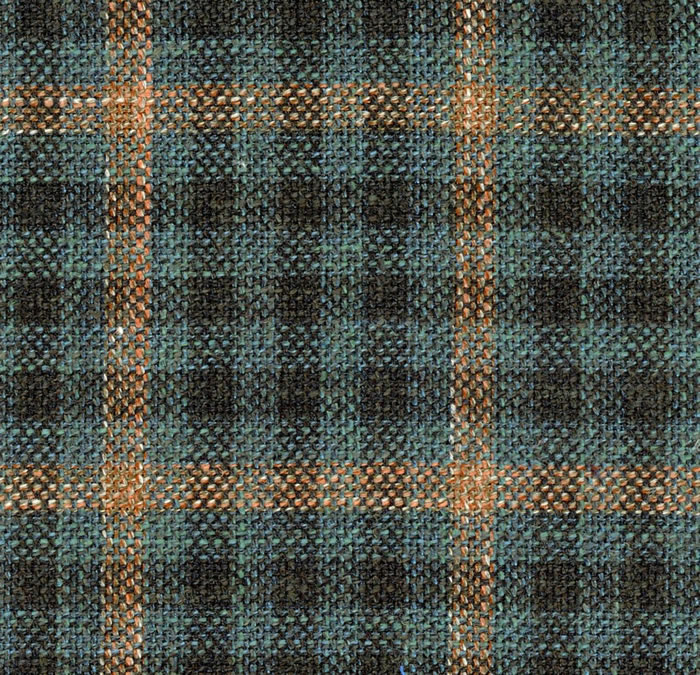
This green check fabric is from Gladson Ltd’s Portofino VI collection. For those that want to know the detailed composition of the fabric, it’s 38% wool, 34% silk and 28% linen. They do offer two other variations on this fabric; one with a lighter brown base, and one with a medium blue base. I was very close to choosing the brown, but in terms of gaps in my sport coat collection… let’s just say brown isn’t one of them.
A great thing about fabrics for Kent Wang’s MTM program, is that they can source just about anything you want – including something you’ve sourced yourself! Yes, they’ll work with cut lengths. On their site, it takes a little digging, but you can find a summary of fabrics, with lots of images of different mill’s books. For quick reference, you can go HERE. Below is their price list. This is a bit of a cumbersome table to read, and you constantly have to flip back and forth between screens if you are trying to plan around a certain price point. It’s a difficulty that stems from offering access to so many mills… To invest in setting up and maintaining a database of fabrics, pricing, etc. would be a massive time commitment, though maintaining a bunch of links to images of swatches requires some work as well.
Pricing
One option might be to sort by collection. For instance, my fabric is from the Portofino bunch, which I believe based on what I could find was a CL4 price. There seems to be on average about $20-30 between pricing levels, and that might be creating too many pricing categories. If there is a lot of variation on cloth costs even within a collection, I suppose it makes sense. From an ease of use perspective, it’s a bit onerous.
| Fabric | 2pc suit | 3pc suit | Jacket | Trousers | Vest | Overcoat |
|---|---|---|---|---|---|---|
| CMT | $750 | $870 | $595 | $280 | $225 | $585 |
| AA | $735 | $860 | $570 | $230 | $155 | $600 |
| A | $795 | $935 | $615 | $255 | $175 | $620 |
| B | $830 | $975 | $645 | $280 | $190 | $640 |
| BB | $850 | $1010 | $660 | $295 | $195 | $665 |
| C | $890 | $1045 | $685 | $315 | $200 | $695 |
| D | $935 | $1095 | $710 | $340 | $215 | $745 |
| E | $995 | $1170 | $760 | $375 | $235 | $795 |
| F | $1060 | $1250 | $800 | $420 | $255 | $840 |
| G | $1120 | $1320 | $845 | $460 | $270 | $890 |
| H | $1195 | $1405 | $900 | $500 | $290 | $945 |
| I | $1265 | $1490 | $950 | $535 | $315 | $985 |
| J | $1330 | $1575 | $990 | $580 | $335 | $1040 |
| K | $1390 | $1645 | $1035 | $615 | $350 | $1080 |
| L | $1465 | $1720 | $1080 | $660 | $370 | $1130 |
| M | $1535 | $1800 | $1130 | $700 | $390 | $1165 |
| N | $1580 | $1870 | $1155 | $725 | $400 | |
| O | $1640 | $1945 | $1200 | $765 | $420 | |
| CL1 | $995 | $1180 | $765 | $380 | $240 | $820 |
| CL2 | $1015 | $1210 | $785 | $395 | $245 | $830 |
| CL3 | $1035 | $1245 | $795 | $415 | $255 | $850 |
| CL4 | $1060 | $1275 | $815 | $425 | $260 | $870 |
| CL5 | $1090 | $1305 | $830 | $435 | $265 | $890 |
| CL6 | $1110 | $1335 | $850 | $455 | $270 | $915 |
| CL7 | $1130 | $1370 | $870 | $465 | $280 | $935 |
| CL8 | $1150 | $1400 | $880 | $475 | $290 | $955 |
| CL9 | $1185 | $1430 | $900 | $495 | $295 | $975 |
| CL10 | $1205 | $1460 | $910 | $510 | $305 | $995 |
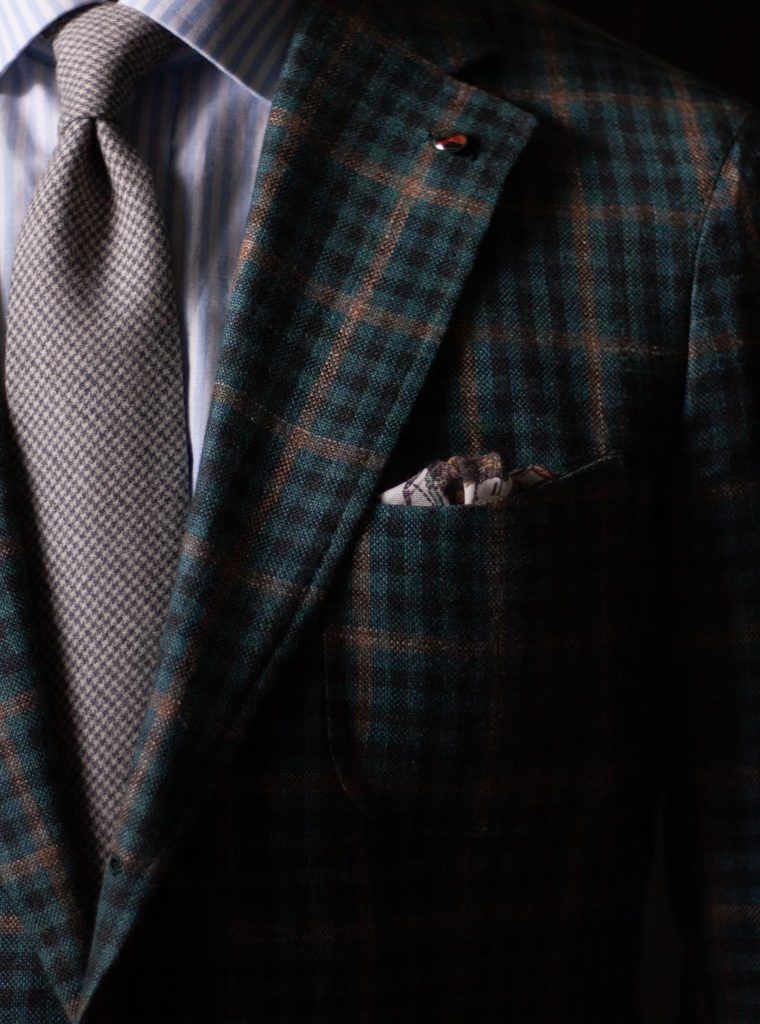
The Construction
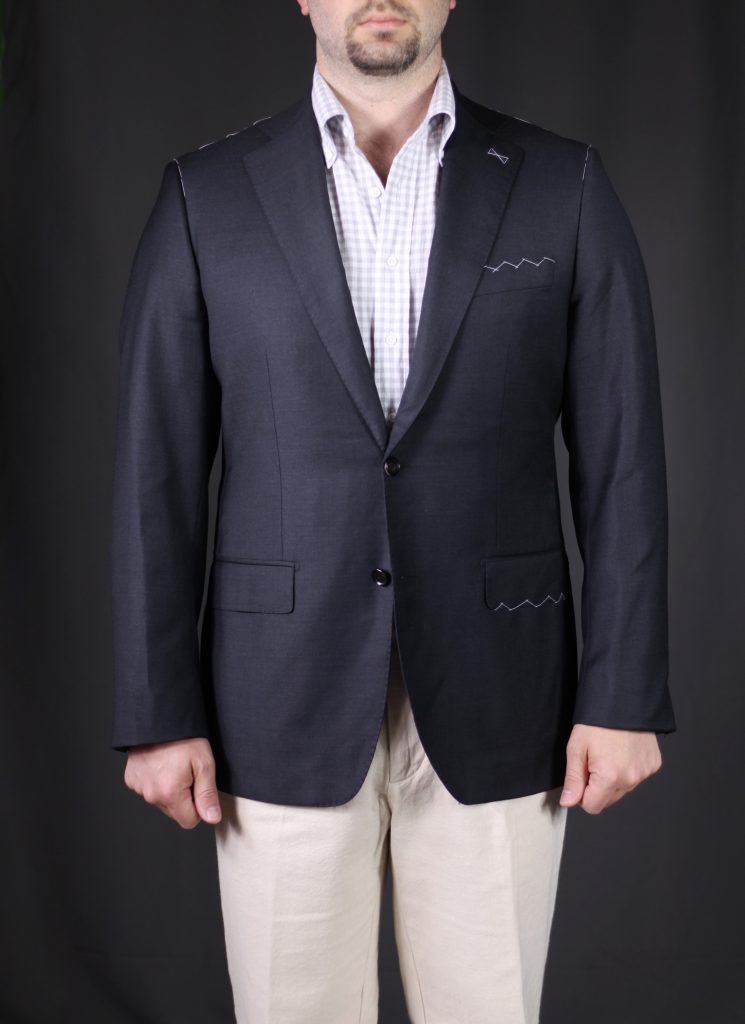
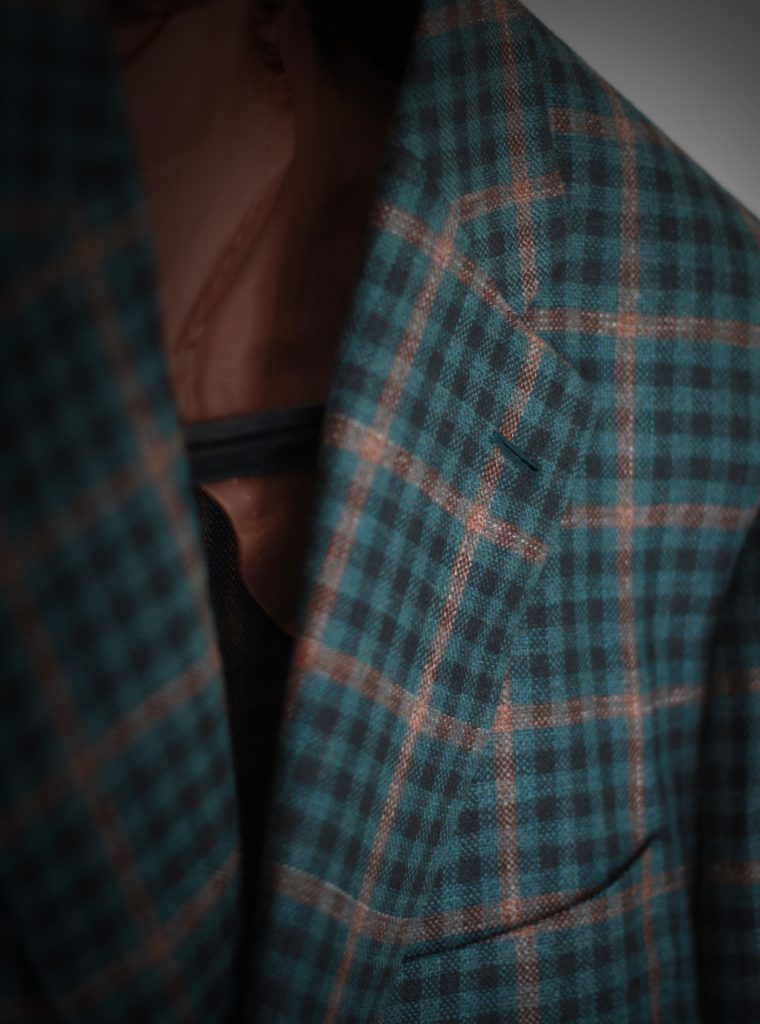
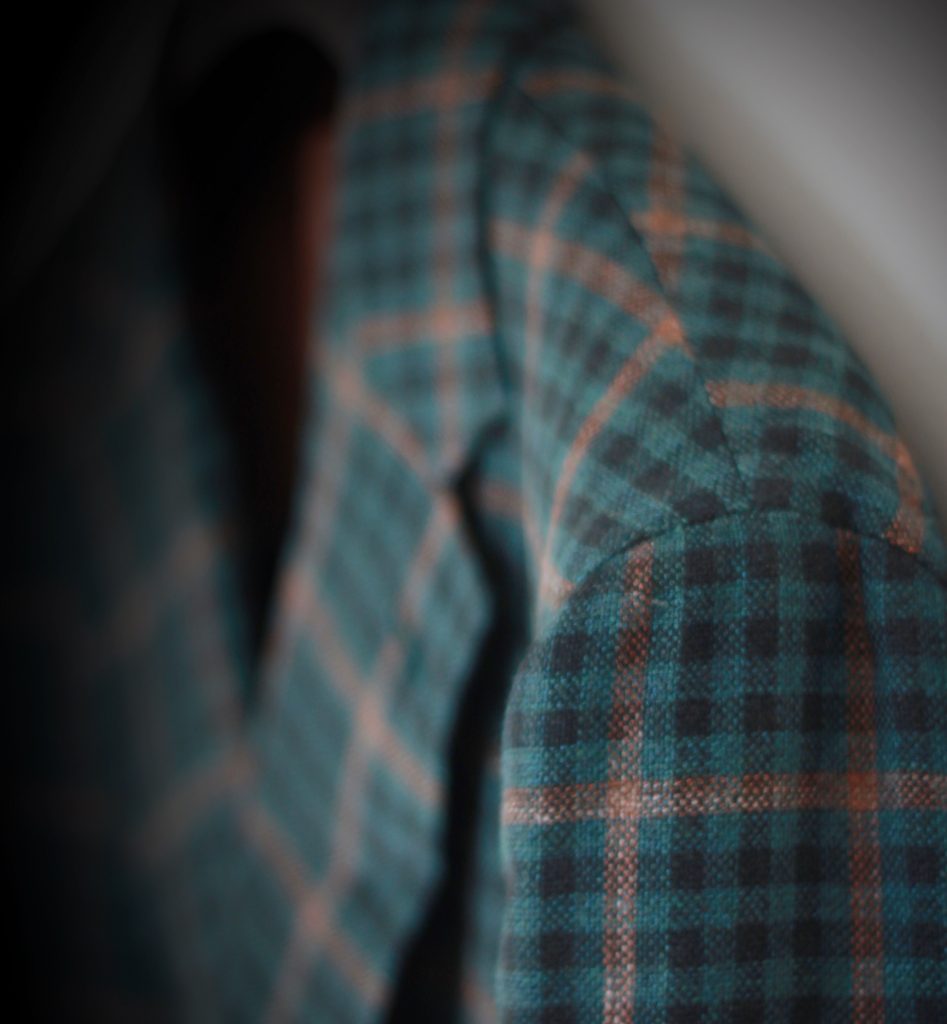
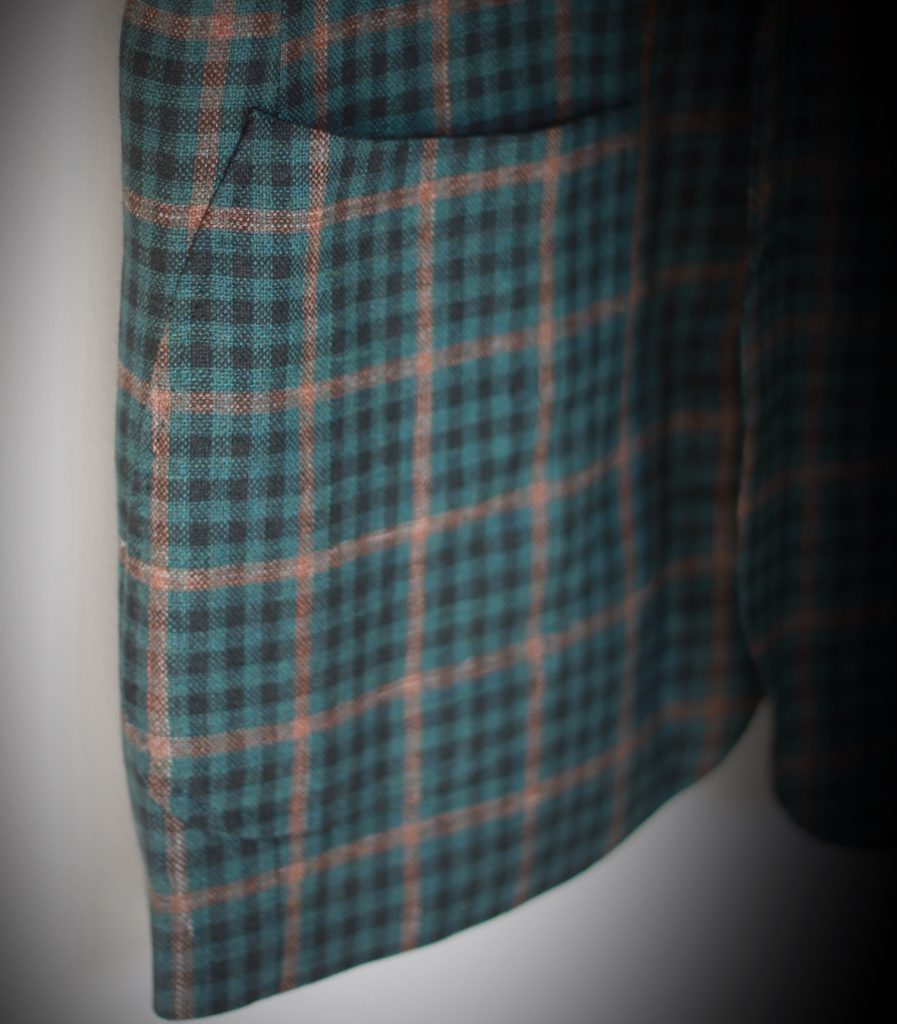
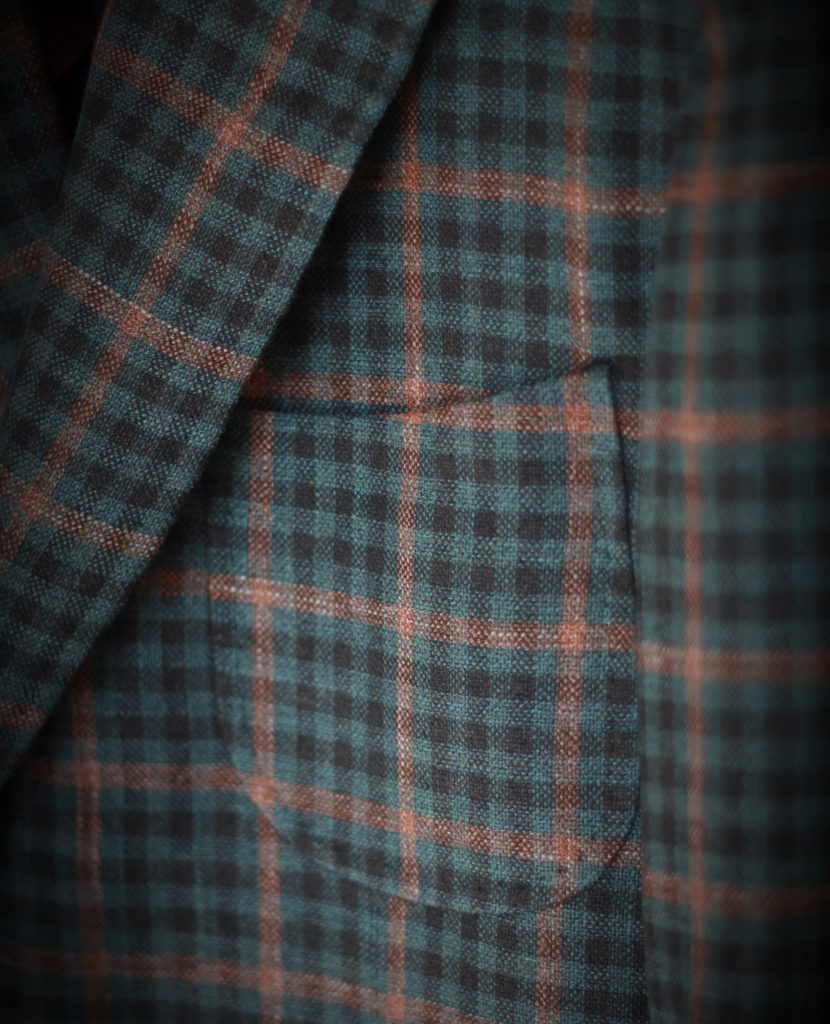
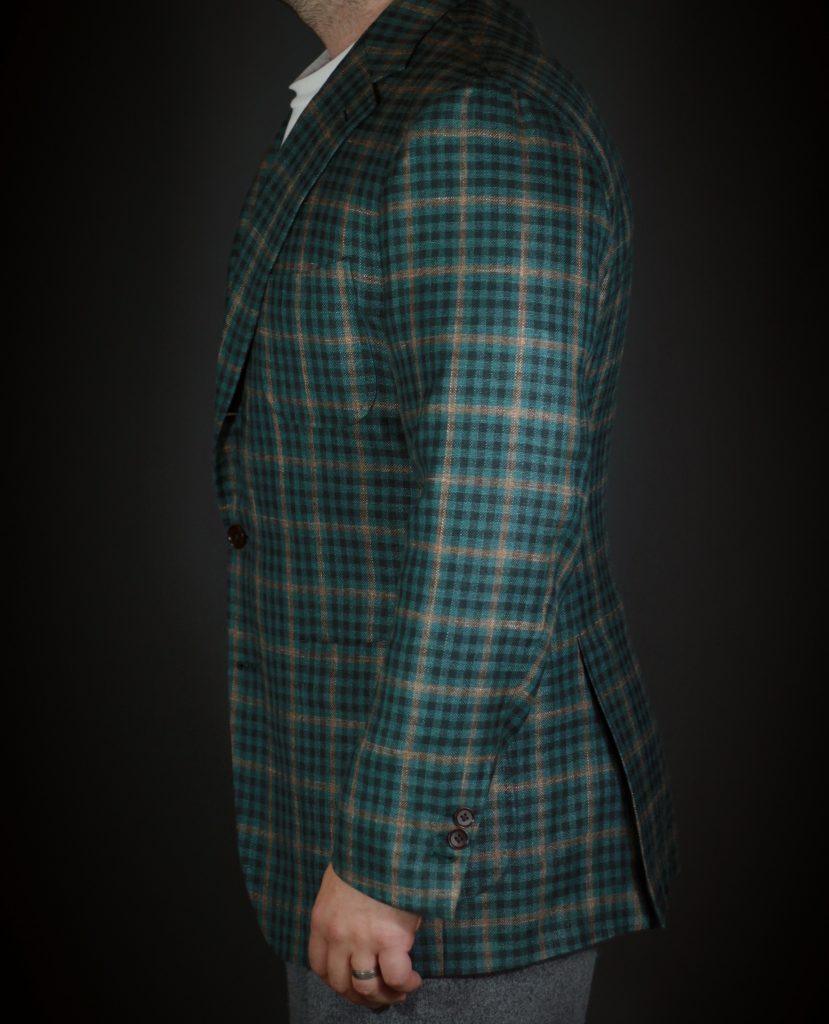
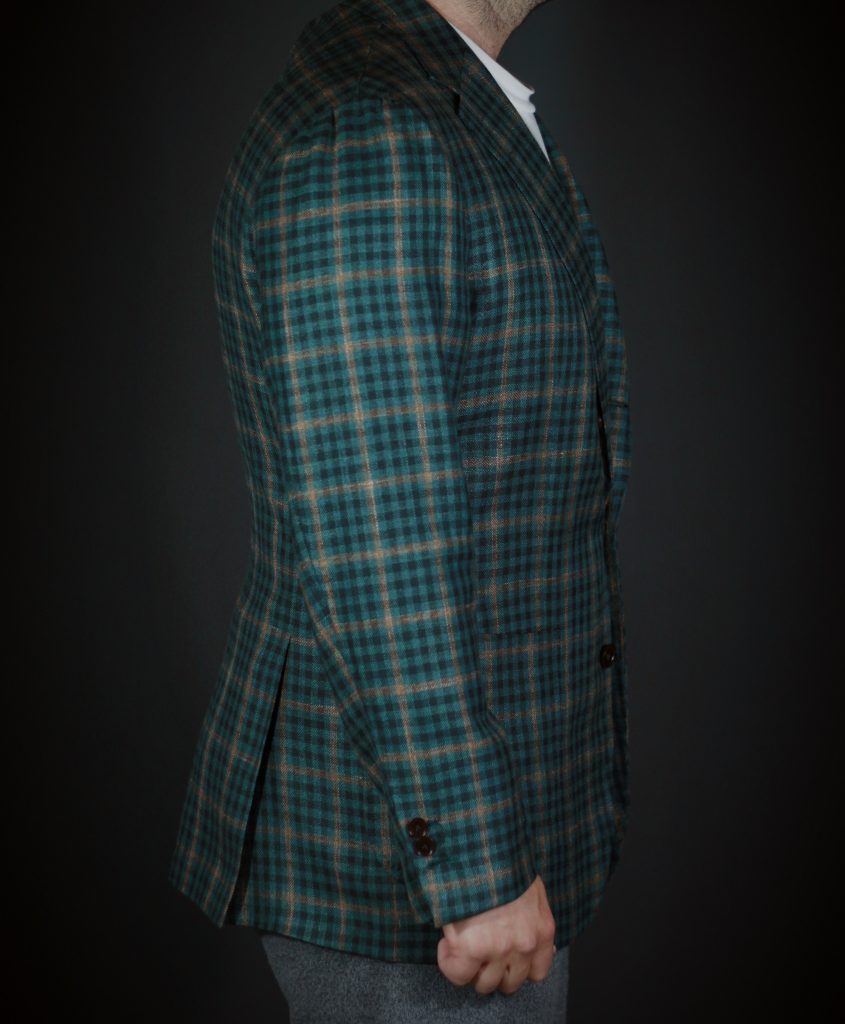
I think we’ll begin looking at the outside of the jacket. The pattern matching is quite well done. I’m especially pleased with the round patch pockets. Matching at the sleeve head is ok, but more importantly it’s well aligned between the sleeve and body. Luck of the draw with the scale of the pattern I suppose! One of the configuration options I went with was for extensive pick stitching, and was very pleased with the execution.
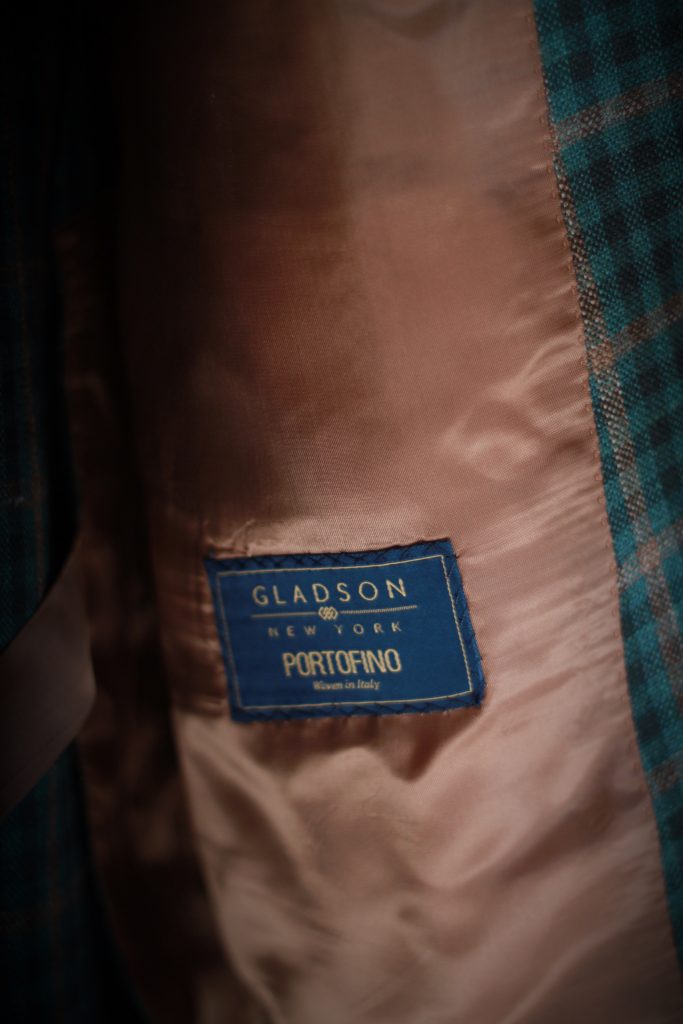
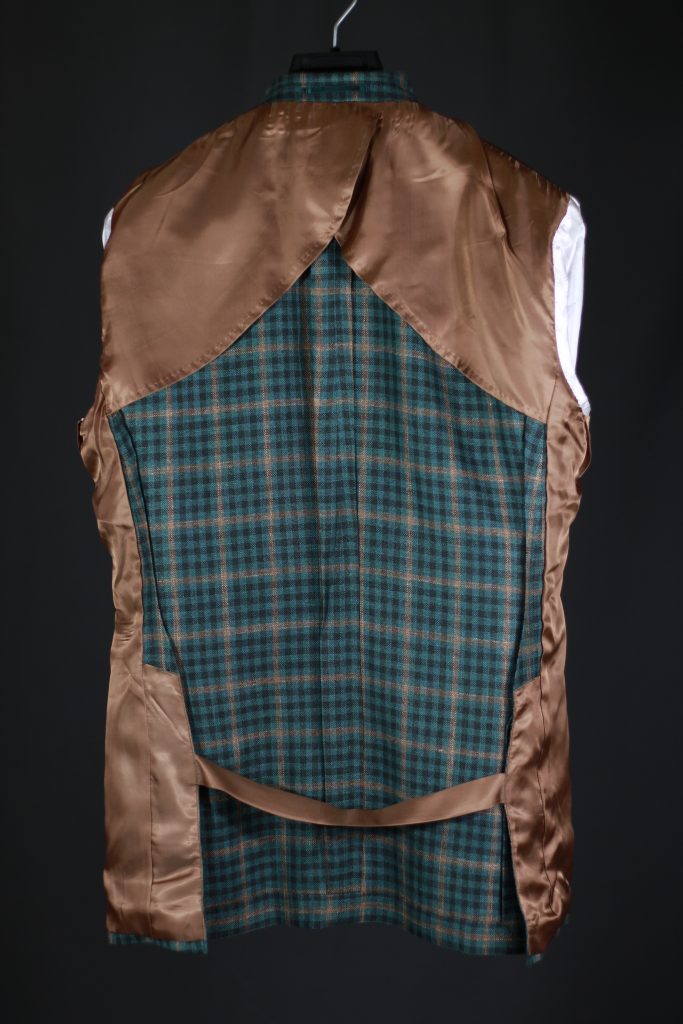
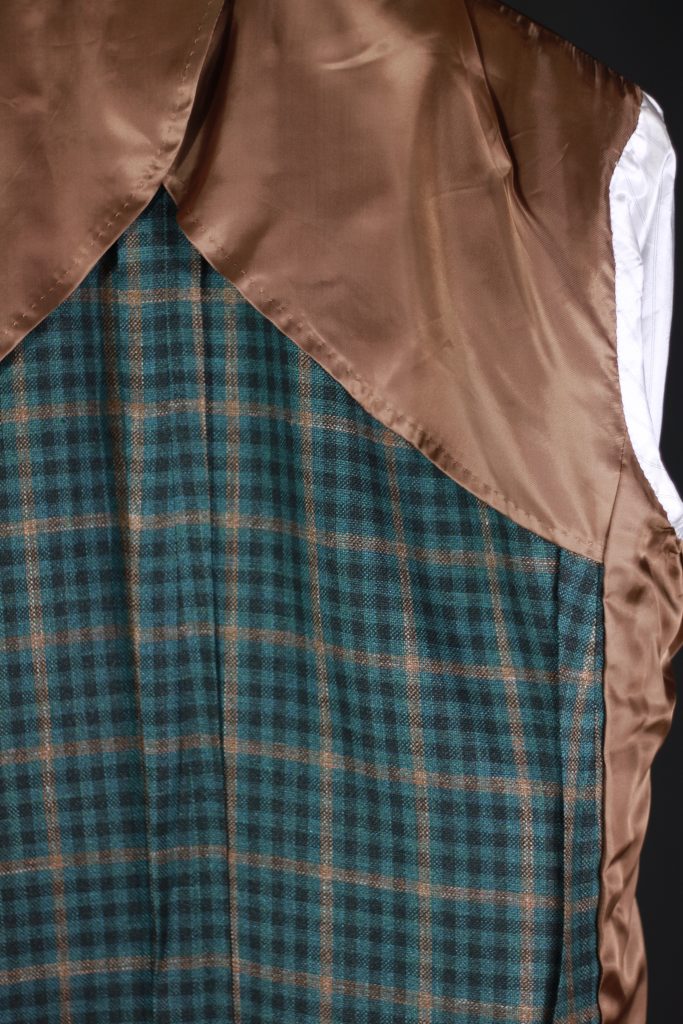
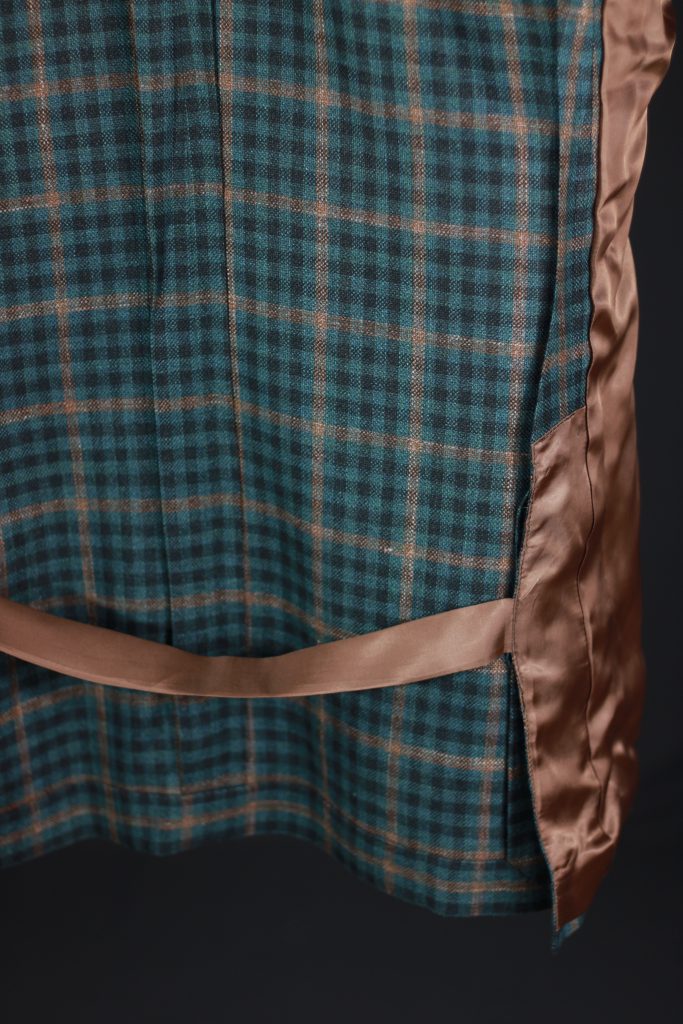
Moving inside the jacket, the soft canvas is a dream. It’s supple with excellent drape. For the partial lining, I chose this dark tan bemberg with dark grey piping accents. Everything is very well put together as you can see below. Something unexpected is this strip of fabric that connects the skirt in behind the rear flap. Considering I have something of a prominent posterior, this helps ensure the sides and back of the jacket hang cleanly.
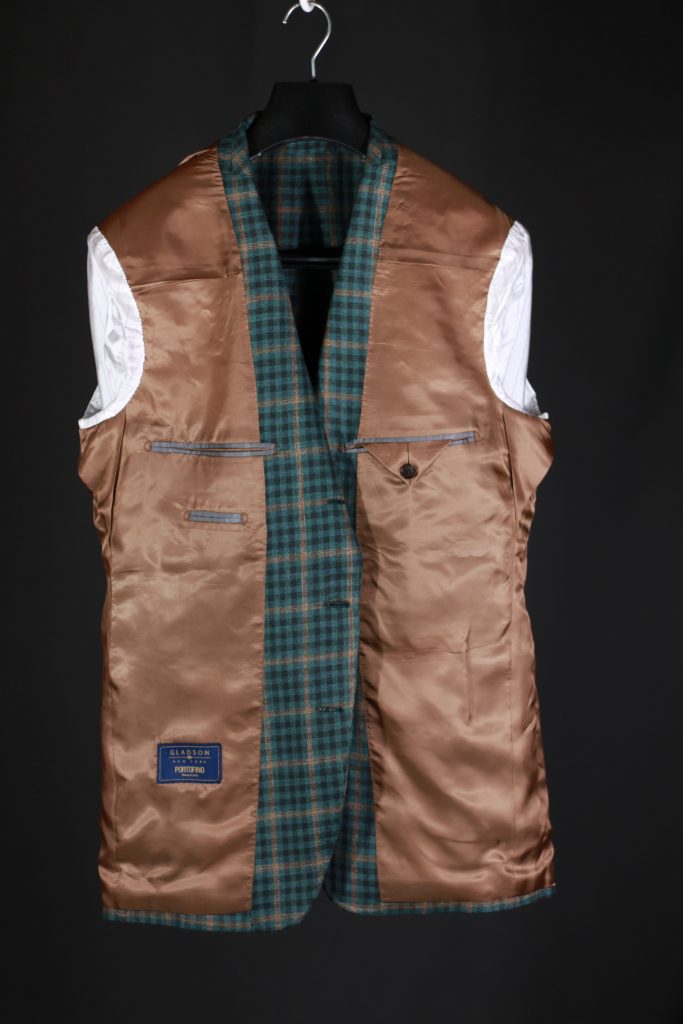
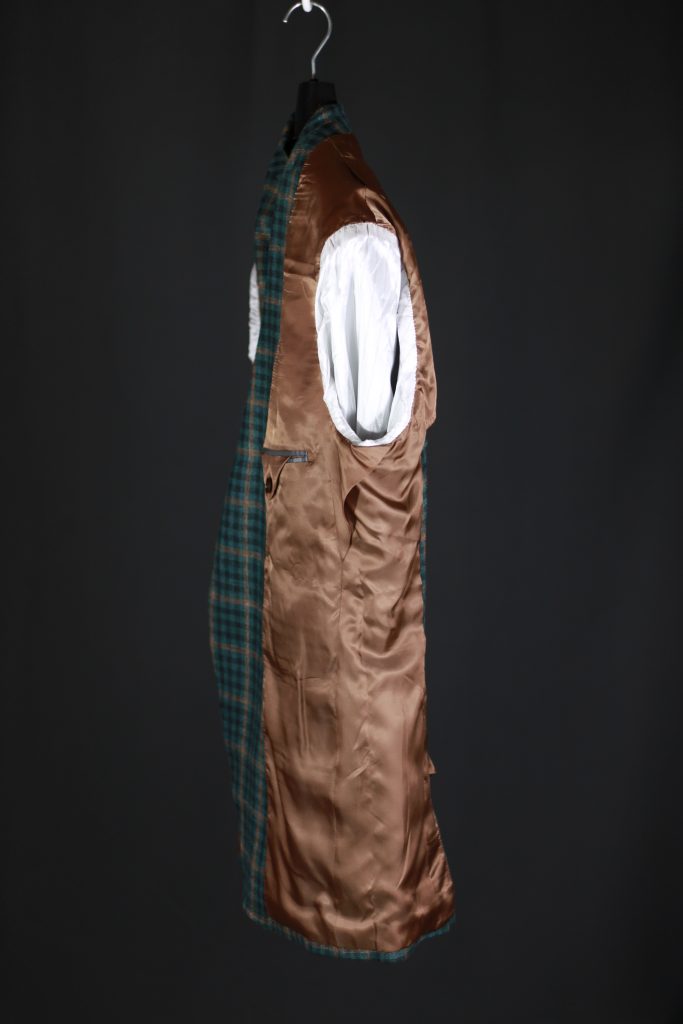
Because the majority of the jacket being unlined, we can see the nice finishing work on all the seams. All in all, the construction is top notch. Kudos to the Kent Wang team!
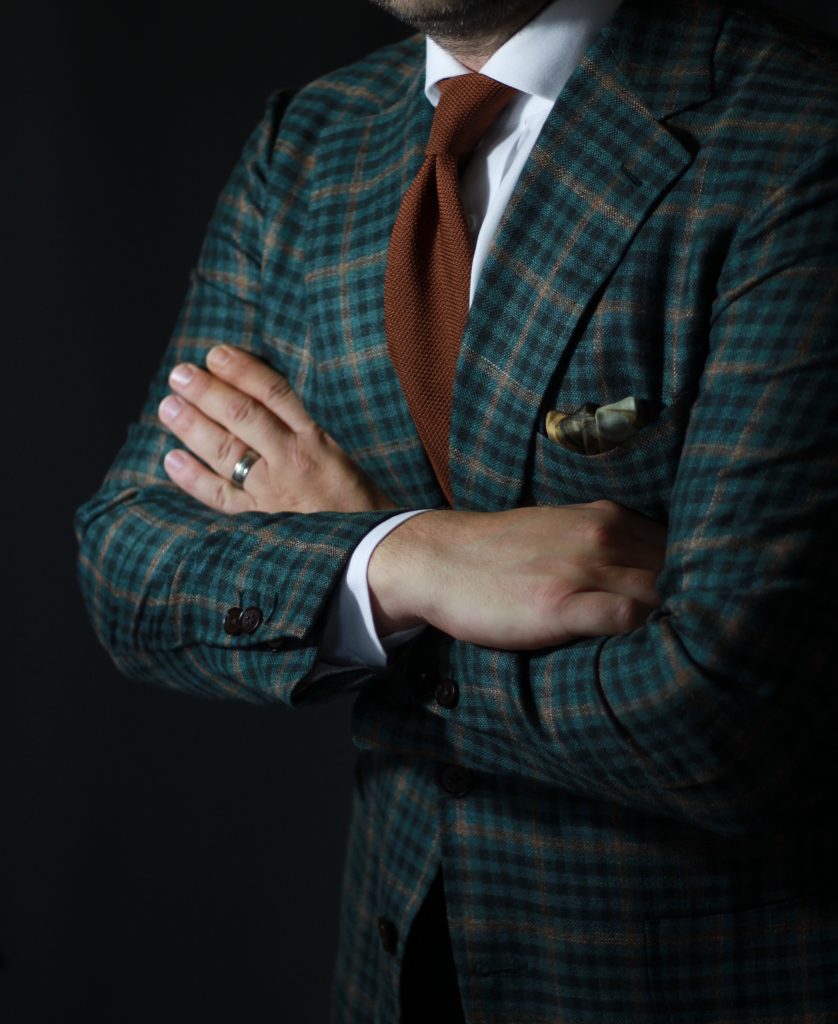
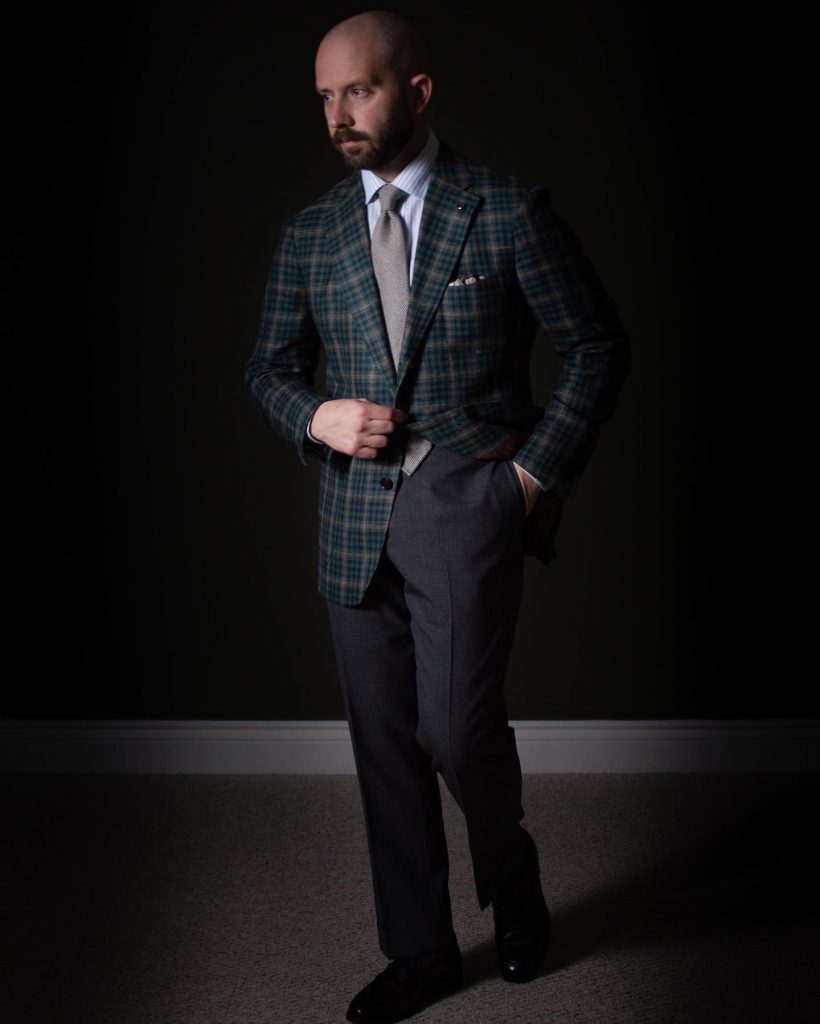
The Fit
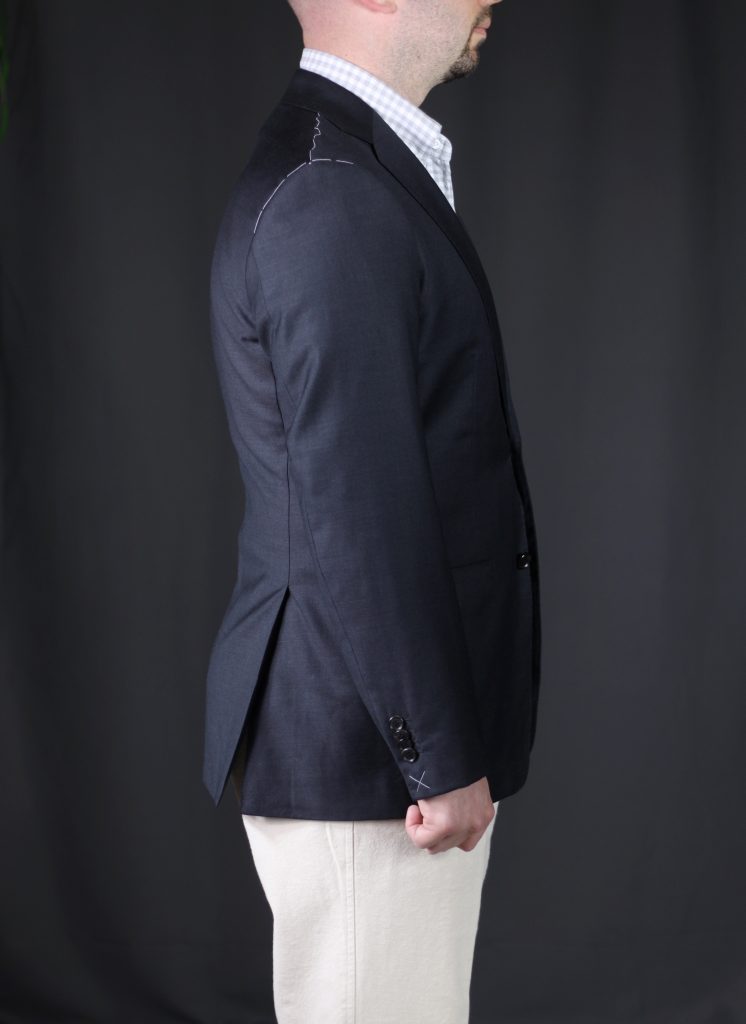
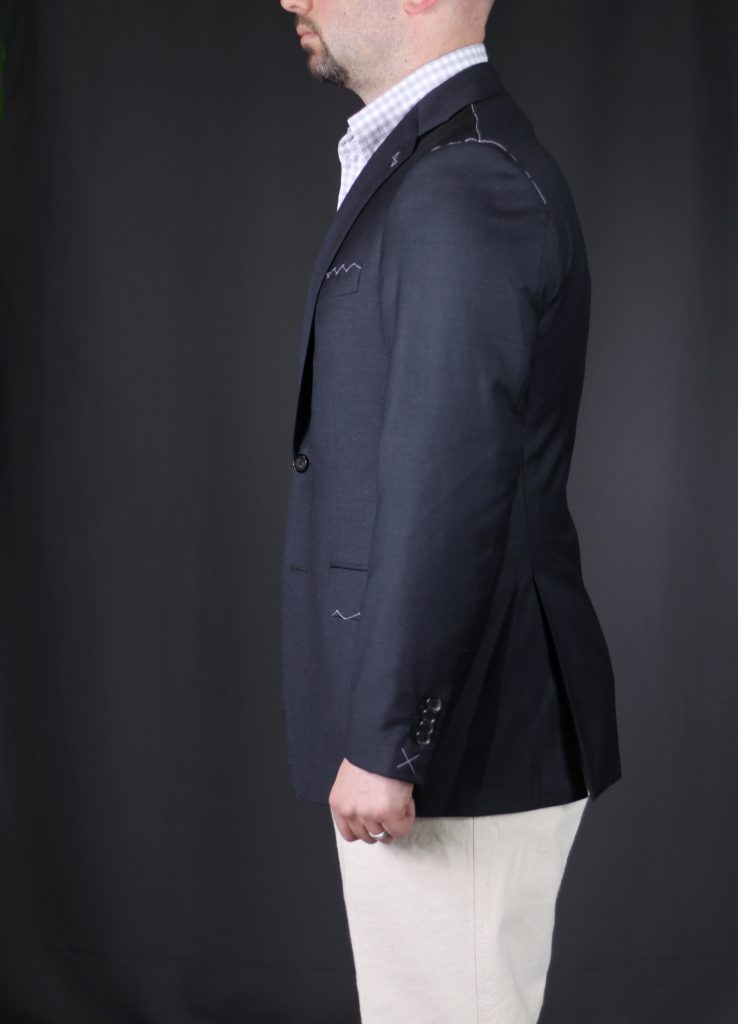
Shoulder, chest and jacket length are all spot on. I’m really pleased with how the jacket feels being worn. One thing I’d adjust for the next go around is to take 1cm off the sleeve length; I’m undecided if I will take them in for alterations. Here are another round of shots to show the differences vs the trial garment.
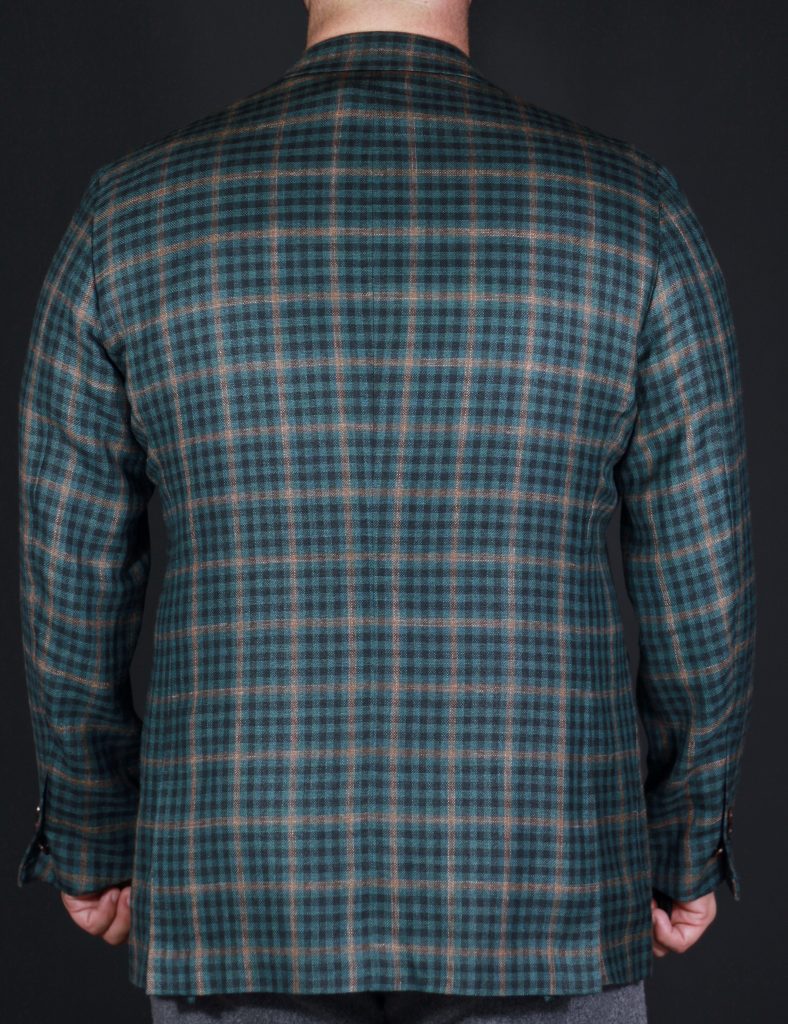

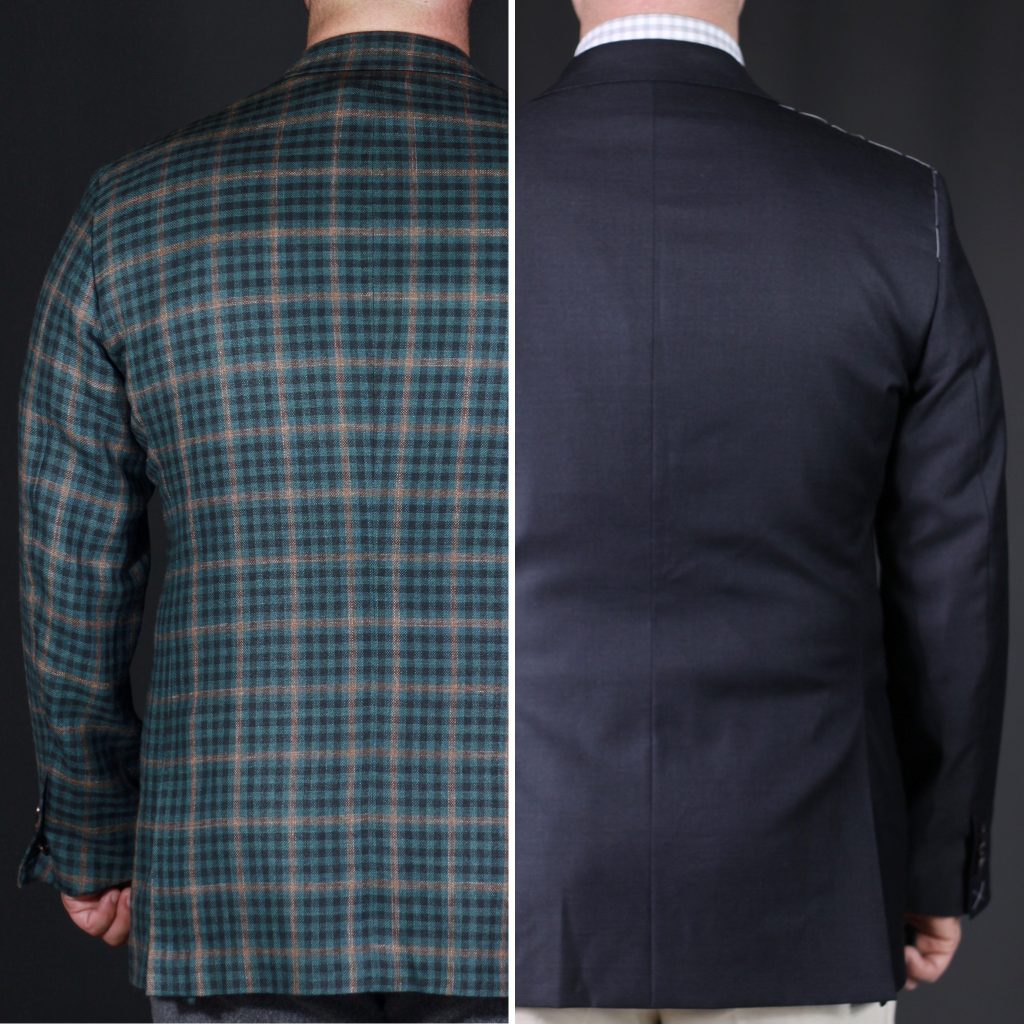
As you can see, the adjustments we made have addressed some of the issues in the back, namely tightness across the lower back, and some rippling near the armpits and just below the collar. The forward posture correction in conjunction with the drop adjustment and sleeve pitch correction have cleaned up both those areas as well.
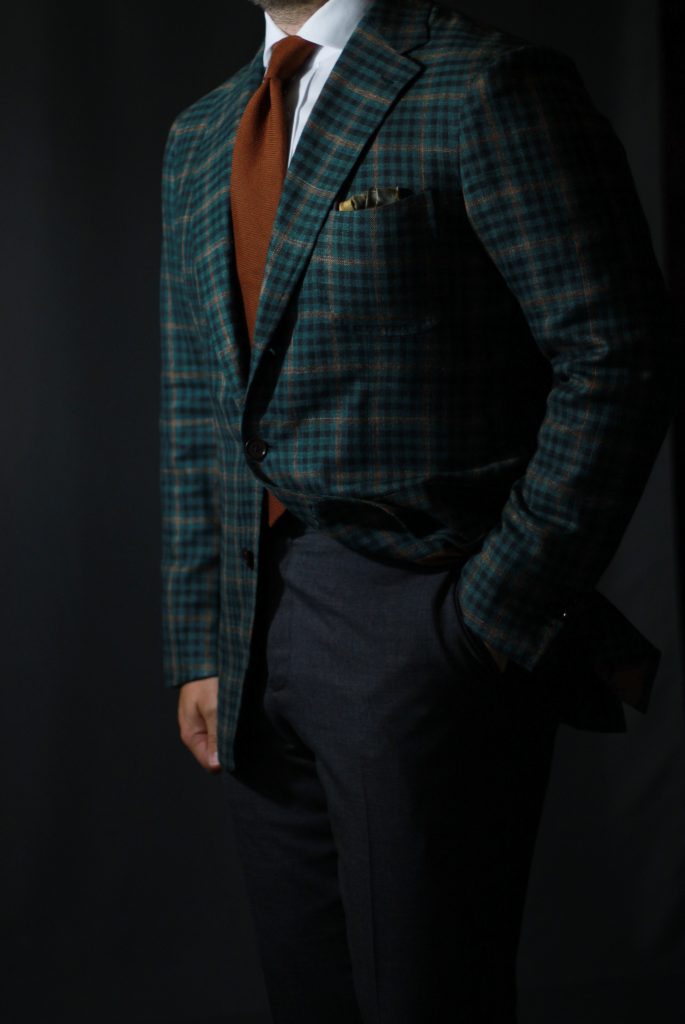
Wearing my Kent Wang MTM
As I mentioned, this is intended to be a fun jacket, something to experiment with. I’m looking forward to exploring lots of pairings.
Kent Wang MTM – Final Thoughts
Hard to Find
Surprisingly, Kent Wang doesn’t have a dedicated portal to access the MTM program – it’s a bit buried within the website. For instance, from the home page you have to navigate to suits from the listing across the header, then select jacket from the dropdown. Then, once you’re there you must select one of the jacket options. Within each of those individual product pages, on the right hand side you can click the “more details” link, which takes you to another page where you can see fit details, pricing, and links to the options form and fabric listings. Alternatively, you can find it by going to the “about” section, and leveraging the links on the right side of that page. Additionally, you can search for “made to measure” and a whole selection of fabrics (with pricing!) are available in the results. But links to the options form, process outline and fabrics are still hard to get to.
It’s really a shame there isn’t a dedicated, centralized location for the made to measure program, especially considering the results! Because of this, my biggest piece of feedback is that it deserves more prominence in Kent Wang’s website. And if some attention is going to be put to that end, I’d also suggest a review of the pricing structure for fabrics, and encourage a more customer friendly, streamlined approach.
Working with Kent Wang
As I said before, correspondence with Aaron was both timely and pleasant. I’m very happy to have had that guidance through the process. My confidence in the adjustments increased dramatically with having an expert appraisal. Sure, I might have been able to improve the fit on my own, but I don’t have as thorough a grasp on how the relationships between measurements have on the resulting fit.
Packaging Letdown
Receiving the garment was a bit of a let-down, at least initially. The jacket was rolled up into a plastic bag, and sent via a soft shipping package without a garment bag or hanger. While I understand the cost-savings and general no-frills approach of Kent Wang, if I had paid for one of the higher end fabrics the experience might have been less than inspiring. Despite the packaging experience, and because the construction and fit are both excellent, I think I can let it slide. I’m really excited to wear this jacket each time I reach for it from my closet. If you’d like to try Kent Wang MTM, the best way to get started is to reach out to Aaron by sending an email to: mtm@kentwang.com. Tell them I sent you, and you can get a $50 discount (I get a credit too).
As always, let me know if you have any questions in the comments below.
-Colin


3 Replies to “Reviewed: Kent Wang MTM Program – Sport Coat”
I’m trying to decide between Spier and Mackay MTO and Kent Wang. I know you have tried both. Do you have a strong preference in terms of quality/price. As for fit, I can visit Aaron in New York, but I also fit Spier and Mackay decently off the rack. Given those options, which would you suggest?
Hi Aaron,
Great question. I think you have to consider flexibility as well. I’ve been lucky to have success through both programs.
Kent Wang, you get the expertise off having a fitting, which adds value imo. There’s also more customization options, and a broader fabric selection.
If S&M fits well off the rack, and you are confident in the adjustments you’d need, they are pretty hard to beat from a pricing standpoint.
I can’t answer how you would prioritize these different things. Ultimately it will come down to which style you prefer, and from there you could stack up fabric pricing, and assign some kind of weight to having in person fitting vs making your own adjustments…
Both are great programs. Sorry I don’t have a more definitive answer for you.
-C
That makes sense. Thanks so much for the quick response and advice!